🖥️ Create the First VM
MOS supports running full virtual machines (VMs) using KVM/QEMU.
This guide walks you through creating and configuring your first VM.
Navigate to:
VMs
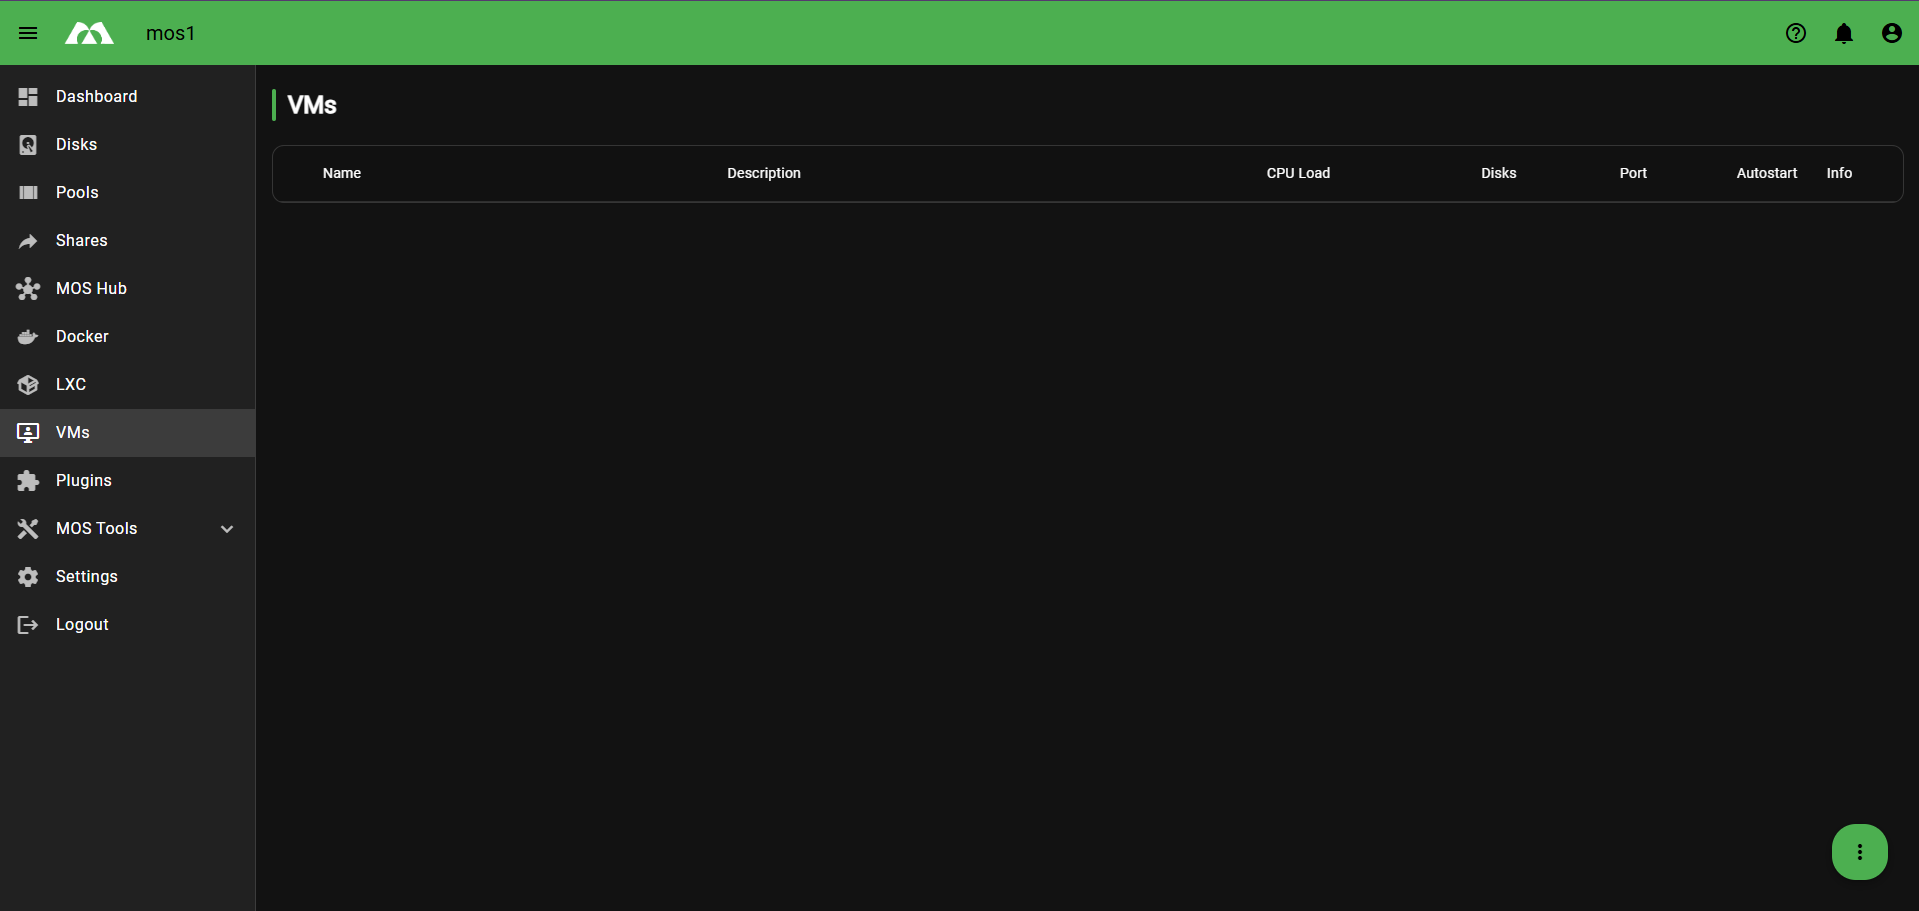
➕ Creating a VM
Click the three-dot menu (⋮) in the bottom right corner and select + Create VM.

⚙️ Basic Configuration
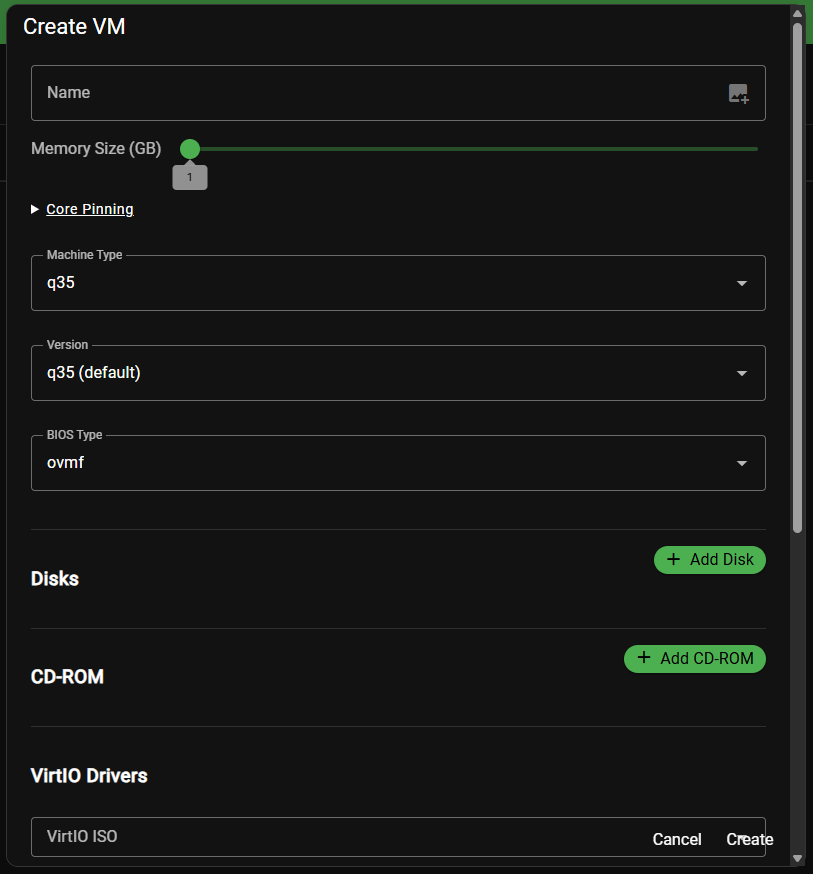
🏷️ Name
The unique name for your VM as it appears in the overview.
Best practices:
- Use short, descriptive names
- Avoid spaces and special characters
🧠 Memory Size (GB)
Defines how much RAM is allocated to the VM.
Use the slider to set the desired memory size in GB.
[!NOTE] Only allocate as much memory as the VM actually needs to avoid starving the host system.
📌 Core Pinning
Allows pinning vCPUs to specific physical CPU cores.
[!TIP] Useful for performance-critical VMs to reduce CPU scheduling overhead.
🖥️ Machine Type
Defines the emulated machine architecture.
| Option | Description |
|---|---|
q35 | Modern PCIe-based machine (recommended) |
pc | Legacy i440FX machine |
🔢 Version
Defines the version of the selected machine type.
Example: q35 (default)
🔧 BIOS Type
Defines the firmware used to boot the VM.
| Option | Description |
|---|---|
ovmf | UEFI firmware (recommended for modern OS) |
seabios | Legacy BIOS |
[!NOTE] Use
ovmffor Windows 11 and modern Linux distributions that require UEFI.
💾 Disks
Click + Add Disk to add a virtual disk to the VM.
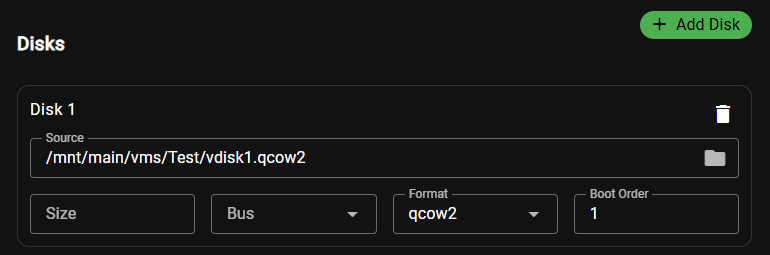
Disk Configuration Fields
| Field | Description |
|---|---|
| 📁 Source | Path to the disk image file (e.g. /mnt/main/vms/Test/vdisk1.qcow2) |
| 📏 Size | Size of the virtual disk |
| 🚌 Bus | Controller type used for the disk |
| 🗄️ Format | Disk image format |
| 🔢 Boot Order | Boot priority (lower = higher priority) |
🚌 Disk Bus Options

| Bus | Description |
|---|---|
virtio | Best performance (recommended for Linux) |
sata | Good compatibility |
usb | USB-attached disk |
scsi | SCSI controller |
ide | Legacy, slowest option |
🗄️ Disk Format Options

| Format | Description |
|---|---|
qcow2 | Supports snapshots, thin provisioning (recommended) |
raw | Maximum performance, no snapshot support |
💿 CD-ROM
Click + Add CD-ROM to attach an ISO image as a virtual optical drive.
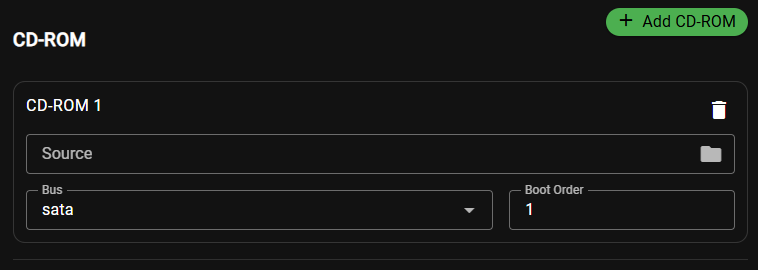
CD-ROM Configuration Fields
| Field | Description |
|---|---|
| 📁 Source | Path to the ISO file |
| 🚌 Bus | Controller type for the CD-ROM |
| 🔢 Boot Order | Boot priority |
🚌 CD-ROM Bus Options

Available options: virtio, sata (default), usb, scsi, ide
[!TIP] Use
satafor best OS installer compatibility.
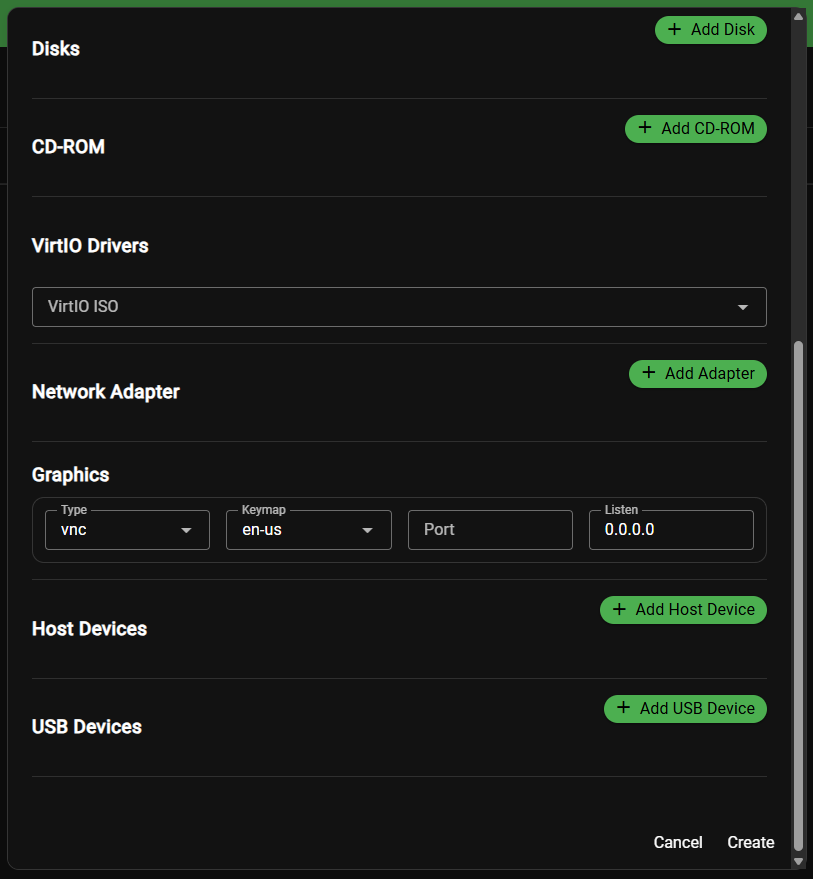
🪟 VirtIO Drivers
For Windows VMs, VirtIO drivers are required to use virtio disks and network adapters.
Select the VirtIO ISO from the dropdown to attach the driver disk.
[!NOTE] The VirtIO ISO must be downloaded and placed on the system beforehand. It provides drivers for disk controllers, network adapters, and more inside Windows VMs.

🌐 Network Adapter
Click + Add Adapter to add a virtual network interface.
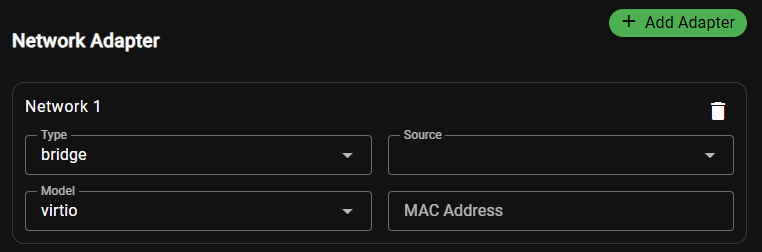
Network Configuration Fields
| Field | Description |
|---|---|
| 🔗 Type | Network connection type |
| 📡 Source | Network bridge or interface to connect to |
| 🖧 Model | Virtual NIC model |
| 🔑 MAC Address | Optional static MAC address |
🔗 Network Type Options
| Type | Description |
|---|---|
bridge | Connects VM to a host bridge (most common) |
macvtap | Direct connection via macvtap interface |
network | Uses a libvirt virtual network |
📡 Network Source Options
| Source | Description |
|---|---|
br0 | Physical network bridge (for real network access) |
virbr0 | Virtual NAT bridge (isolated network) |
🖧 Network Model Options
| Model | Description |
|---|---|
virtio | Best performance (recommended) |
e1000 | Intel Gigabit emulation, good compatibility |
rtl8139 | Legacy, broadest compatibility |
🖼️ Graphics
Defines how the VM's display is accessed remotely.
Graphics Configuration Fields
| Field | Description |
|---|---|
| 🖥️ Type | Remote display protocol |
| ⌨️ Keymap | Keyboard layout used inside the VM |
| 🔌 Port | Port for remote display connection (leave empty for auto) |
| 👂 Listen | IP address to listen on (0.0.0.0 = all interfaces) |
🖥️ Graphics Type Options
| Type | Description |
|---|---|
vnc | Basic remote display (default, widely supported) |
spice | Advanced protocol with better performance and USB redirection |
none | No graphical output |
⌨️ Keymap Options
Select the keyboard layout that matches your physical keyboard:
en-us, en-gb, de, de-ch, fr, fr-be, and more.
🔌 Host Devices
Click + Add Host Device to pass through a physical PCI device directly to the VM.

[!WARNING] PCI passthrough gives the VM exclusive access to the device. The host will no longer be able to use it while the VM is running.
Common use cases:
- 🎮 GPU passthrough for gaming VMs
- 🌐 Dedicated network card passthrough
- 💾 NVMe/storage controller passthrough
🔌 USB Devices
Click + Add USB Device to pass through a connected USB device to the VM.
Select the USB device from the dropdown — all currently connected USB devices are listed.

Examples of passthrough devices:
- 🔵 Bluetooth adapters
- 💾 USB flash drives
- 🖱️ Input devices
[!NOTE] USB passthrough requires the device to be physically connected to the host at VM start time.
✅ Finalizing the VM
Once all settings are configured, click Create to create the VM.
The new VM will appear in the VMs overview with a stopped state.
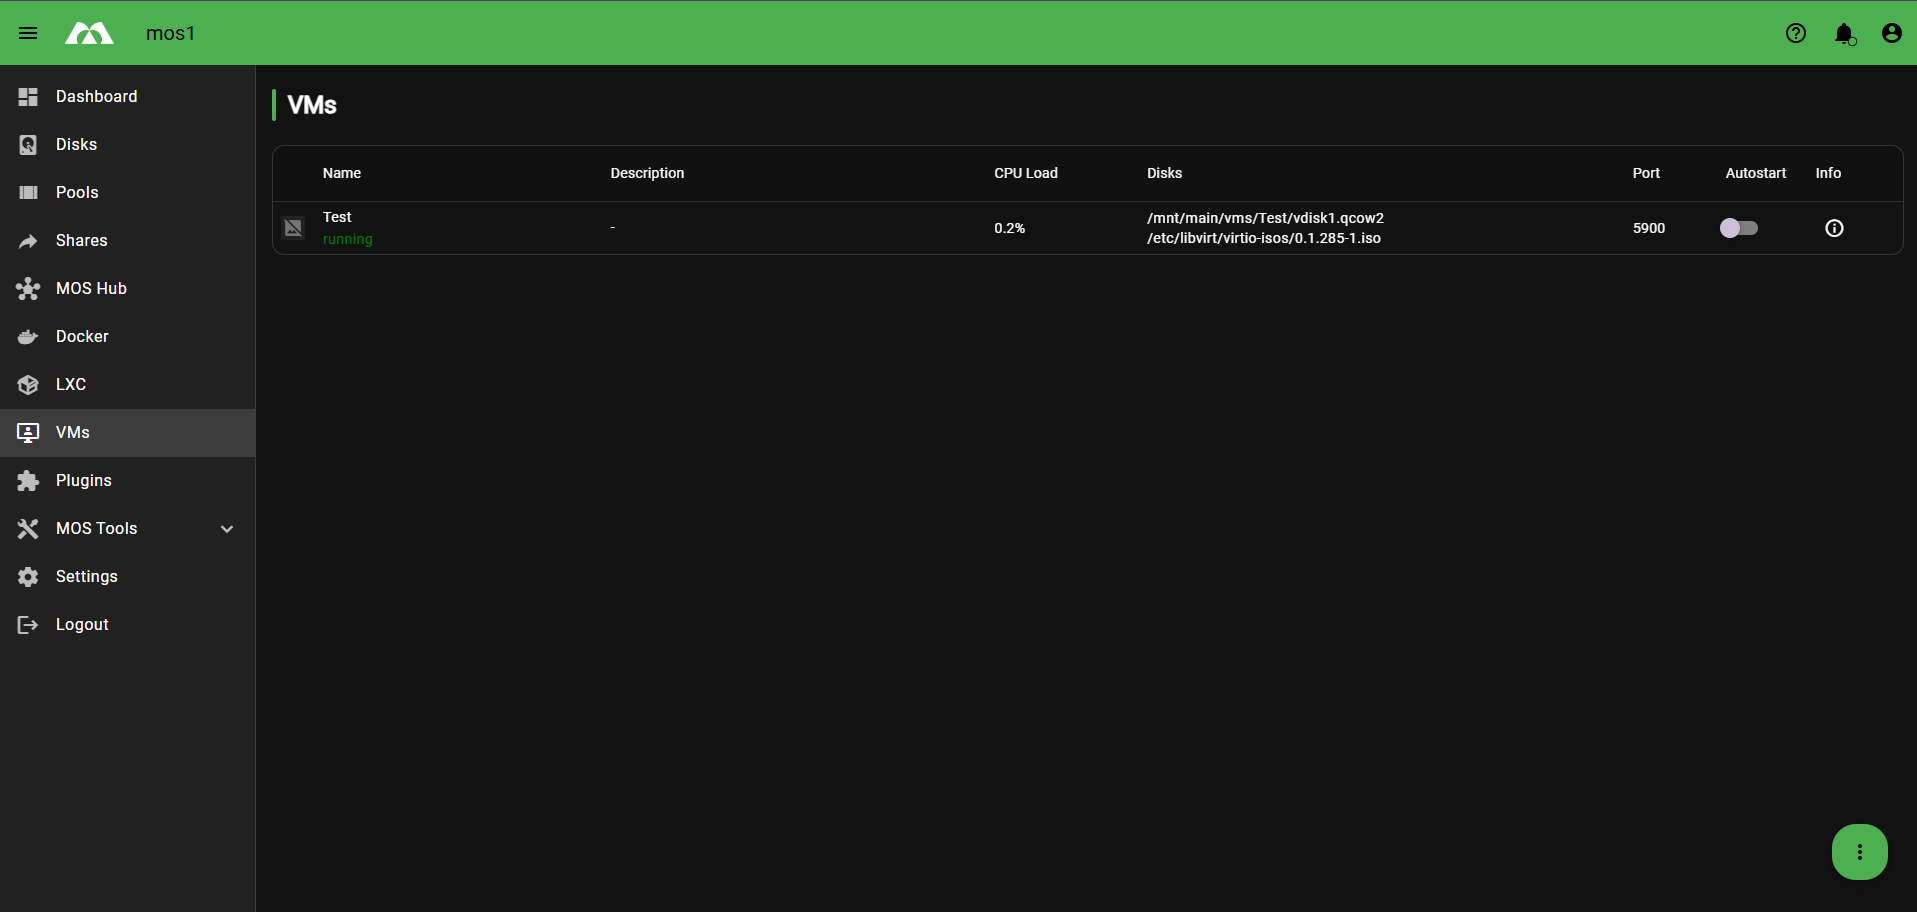
📋 VM Overview Columns
| Column | Description |
|---|---|
| 🏷️ Name | VM name and current state |
| 📝 Description | Optional description |
| 📊 CPU Load | Live CPU usage while running |
| 💾 Disks | Attached disk and ISO paths |
| 🔌 Port | VNC/SPICE port for remote access |
| ▶️ Autostart | Whether the VM starts automatically on boot |
| ℹ️ Info | Additional VM information |
✅ Summary
To create your first VM, follow these steps:
- 🏷️ Set a Name and configure Memory
- 🖥️ Choose Machine Type and BIOS Type
- 💾 Add a Disk and select format + bus type
- 💿 Add a CD-ROM with the OS installer ISO
- 🪟 (Windows only) Attach the VirtIO ISO
- 🌐 Add a Network Adapter
- 🖼️ Configure Graphics for remote access
- 🔌 (Optional) Add Host Devices or USB Devices
- 🚀 Click Create — your VM is ready!
Parts of this documentation were created with the assistance of AI tools. All AI-generated content has undergone review, but it may still contain inaccuracies, omissions, or outdated information.